
Actually, I've studied about robots since two weeks ago.
This week, I learned the basic guideline for robot, its components and their functions.
Such a wonderful moment!


The upper pictures were taken since last week. I worked with Fah. We both didn't know much about robots. We just kept following the steps. Many robots in the program are designed from the real things or living things but I can't remember what the original model of this robot is.
So, this week we learned more detailed principles and how to set program to control the robot.
Now, I just mention some basic information for starting using robot.

https://youtu.be/HfotbERf0DQ
ฮั่นแหนนนน่ จะเลื่อนผ่านใช่มั้ยล่ะ ห้ามนะ! ลองดูวิดีโอของเราก่อน
Let's connect some components to the main body of robot.
 |
| This photo was taken when we finished the last step. |
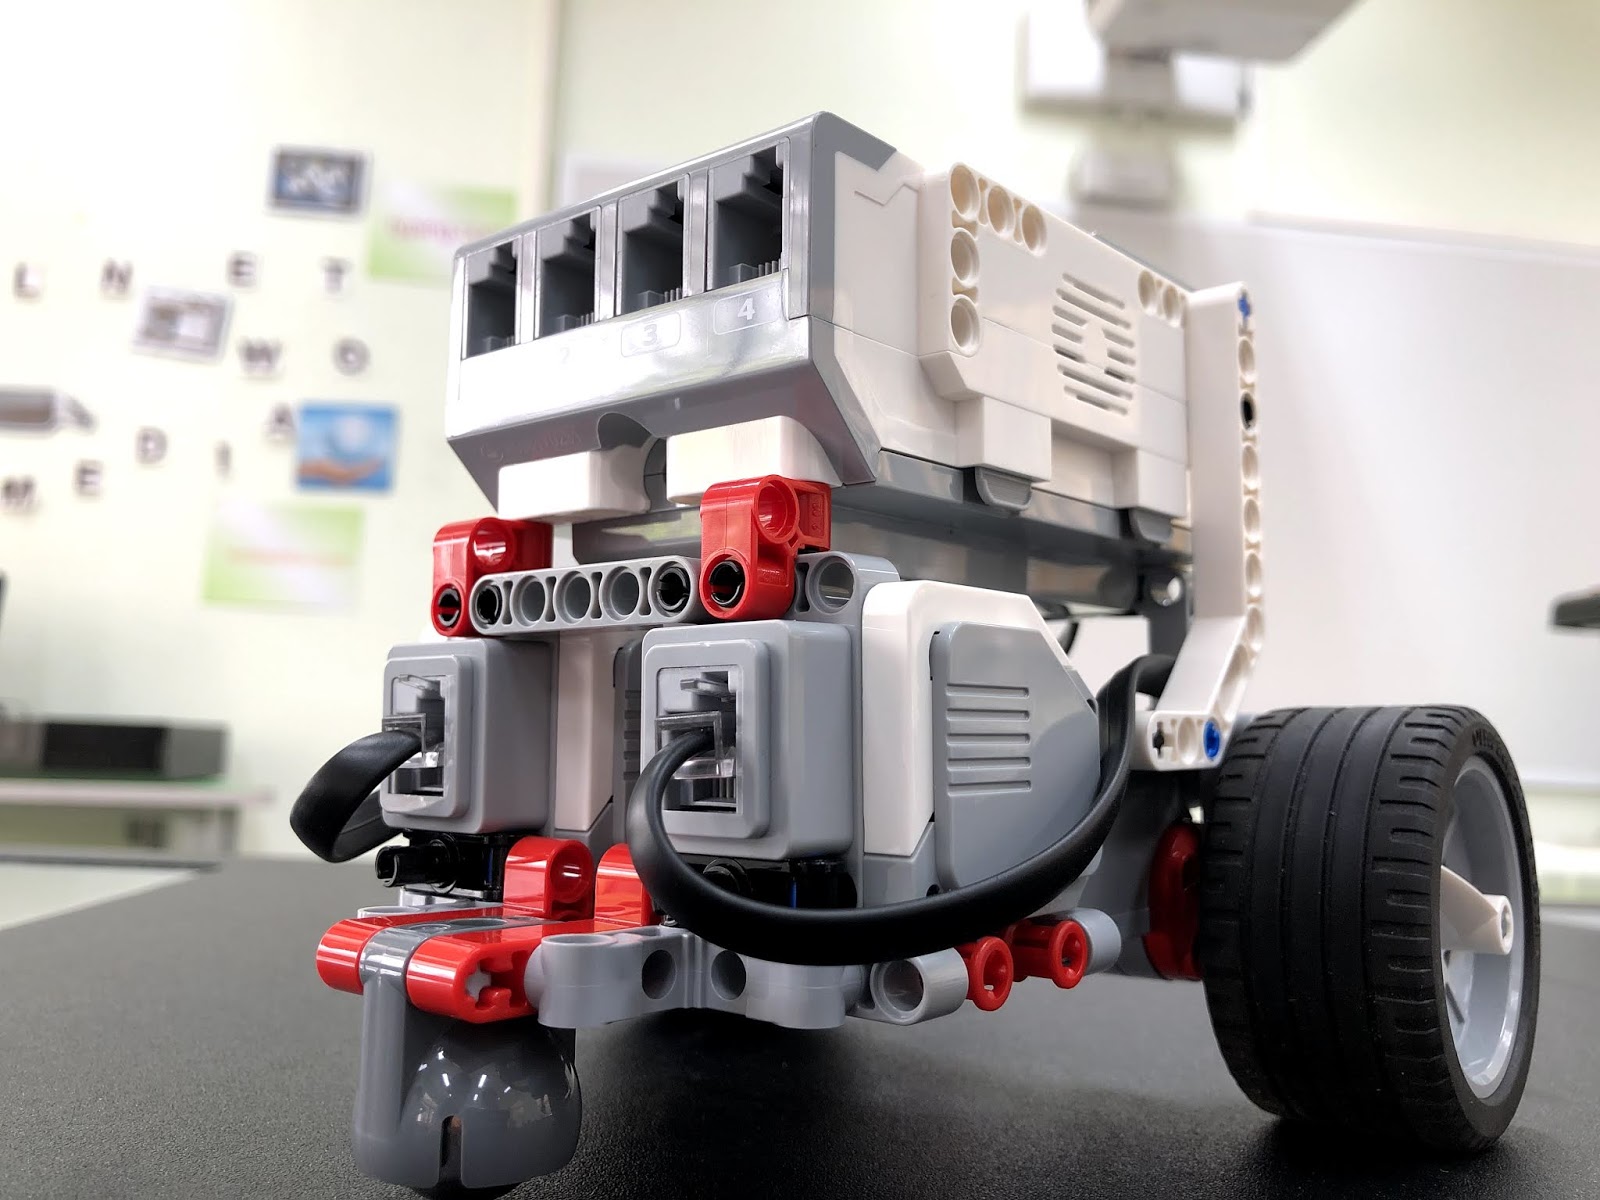
Can you see the white box? It is monitor which is main part for setting program.
The very first one, you have to put battery on to run the robot. LoL
 |
| EV3-PPMEEN |
After that, Meena and I thought of this little robot's name for a while. There were many names before we chose the last name, PPMEEN. That's very cool name!
You can change a robot's name by pressing the button at the Brick Name. Can you you see the last one?

Then you connect monitor with your device such as computer or mobile phone. You can use the internet, Bluetooth or USB wire. First, I tried it with Bluetooth but my program is in the computer so I had to connect with USB wire instead.

ปล. ถ้าใครได้ดูวิดีโอจากลิ้งค์ที่เราใส่ไว้ ลองทายดูนะว่าโน้ตที่ PPMEEN เล่น เป็นของเพลงอะไร

รูปนี้เป็นการทดสอบตัวมอเตอร์ โดยที่เราจะตั้งโปรแกรมลงในคอมก่อนแล้วกดทดสอบจ้า
ถ้าดูจากวิดีโอจะเห็นล้อสีแดงหมุนและยกขึ้นบ้าง

ส่วนรูปนี้เป็นการทดสอบให้มอเตอร์หมุน โดยการกดปุ่มคำสั่งแทนการให้โปรแกรมเล่นอัตโนมัติ
มอเตอร์จะหมุนตามที่เราตั้งค่าโปรแกรมไว้ก็ต่อเมื่อเรากดปุ่มคำสั่งจ้า

ขั้นตอนนี้เป็นการทดสอบการหมุนของมอเตอร์ โดยใช้ระบบเซนเซอร์ มอเตอร์จะเริ่มหมุนก็ต่อเมื่อเรานำสิ่งของที่มีสีตามที่เราตั้งค่าในโปรแกรมให้เซนเซอร์จับ แล้วมอเตอร์ก็เริ่มทำงานนนนน
ปล. เวลาจะทดสอบโปรแกรมใดๆ ก็ตามตั้งกดเล่นโปรแกรมก่อนนะคะ เตือนไว้เผื่อใครเล่นหุ่นยนต์เพลินแล้วลืมกดเล่นโปรแกรม แล้วก็งงว่าทำไมหุ่นยนต์ไม่ขยับเลย เพราะเราก็เป็นบ่อยจ้า
เราอาจจะอธิบายงงๆ บ้าง ข้ามขั้นตอนบ้าง เพราะจริงๆ แล้วขั้นตอนเยอะมาก แต่ความสนุกก็มีมากเหมือนกันนะ เราก็เล่นจนเพลินเลยไม่ได้บันทึกข้อมูลมาเขียนบล็อกเยอะเท่าไหร่ ถ้าทุกคนมีโอกาสได้เล่นหรือเรียนเรื่องนี้ ลองดูนะ ตอนแรกเราก็ไม่คิดว่าเรื่องหุ่นยนต์จะสนุกขนาดนี้ ยิ่งตอนที่เราได้ทำงานร่วมกับเพื่อน ยังช่วยฝึกทักษะการทำงานร่วมกับผู้อื่นอีกด้วย
ปล. วันนี้เราอาจจะเขียนเยอะไปหน่อย ไม่ต้องอ่านหมดก็ได้นะ แต่ขอให้อ่านข้อความสุดท้ายของเรา
เราเป็นกำลังให้ทุกๆ คนที่กำลังมีความทุกข์ในใจ หรือมีปัญหาต่างๆ ยังไงก็สู้ๆ นะคะ
เธออะเก่งอยู่แล้ว ใช้ชีวิตให้คุ้มไปเลยยยย
ปล. บล็อกงานหรือเว็บเด็กดีจ้ะ อย่าลืมดูวิดีโอของเรานะ รีบตัดสุดๆ ไปเลยจ้า อยากให้ทุกคนได้เห็นภาพตอนที่พวกเราทดสอบหุ่นยนต์ มีฉากหลุดอีกเยอะ อันนี้ตัดเฉพาะส่วนจริงจิง
BY โอปอ
ความคิดเห็น
แสดงความคิดเห็น